All disk partition size are allocated when building the Server or PC, but things are changing and original partition configuration may not fit for your needs any longer, the typical example is that system C drive is running low, so you need to decrease a partition size and extend C. Some people want to decrease the large data partition size and create more to save different kinds of files. So in this article, I want to talk about how to decrease partition size in Windows Server 2008/2003 and Windows 7/Vista/XP.
Decrease partition size in Windows Server 2008 and Windows 7/Vista
From Windows Vista, Microsoft adds new 'Shrink' feature to reduce partition size under Disk Management.
To decrease a partition size,
1. Open 'Disk Management', right-click 'My Computer' > 'Manage' > 'Storage' > 'Disk Management', where you'll see all disks and partitions that connected the Server or PC.
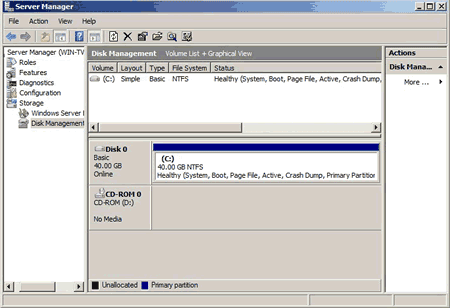
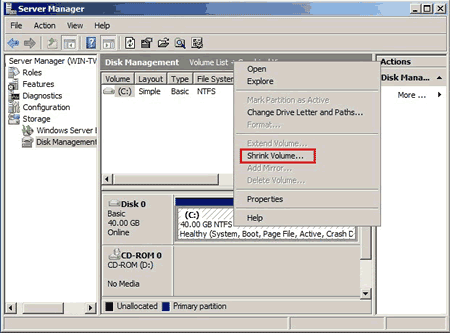
2. Right-click C: drive and select 'Shrink Volume'.
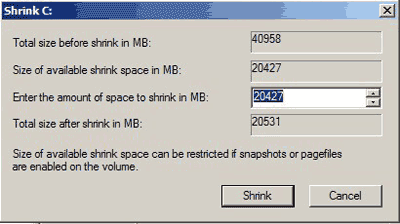
3. In the pop up window, input the value much space to shrink. The default value is the maximum size can be shrank.
4. Click Shrink, several minutes later, this partition will be shrank and free Unallocated space created at the end of it.
>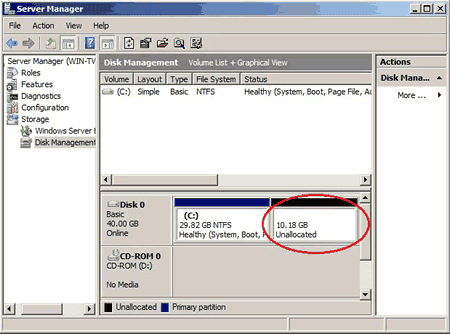
After these steps, you can decrease partition size in Windows 7/Vista and Server 2008.
Decrease partition size in Windows 2003 Server and XP
Different with Windows Server 2008/Vista/7, there is no 'Shrink Volume' feature in Windows 2003 Server and XP disk management. There is no shrink command in diskpart.exe built-in Windows 2003 and XP either.
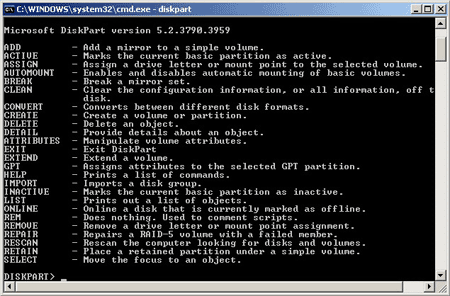
Then how to decrease partition size in these Windows versions? Third party partition software will help you, such as Acronis Disk Director, Aomei Partition Assistant, etc.
Steps to decrease partition size
Launch Aomei Partition Assistant, you'll see all disk partitions that is similar with Windows Disk Management.
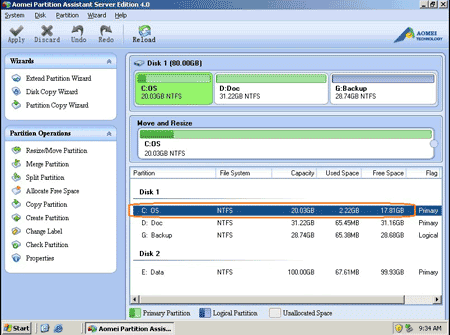
Right-click the partition you want to decrease and select 'Resize Partition', in the pop up window, drag the left border rightward.
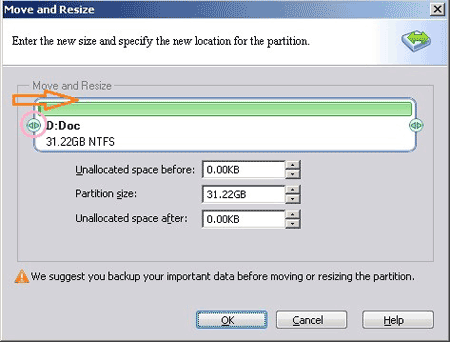
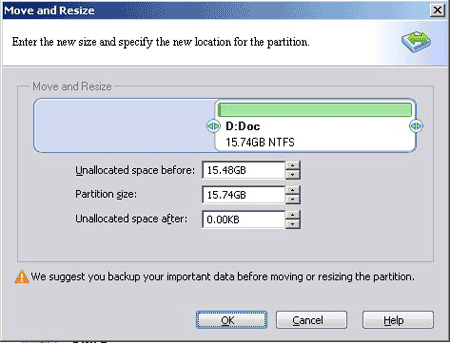
After clicking 'OK', you'll back to main window, where you'll see that C drive size has been decreased and there is free Unallocated space created after C drive.
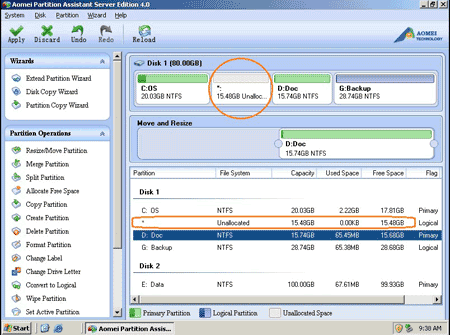
If you drag right border leftward, the Unallocated space will be created afer drive D.
The free Unallocated space can be used to create new partitions or extend another drive, such as system C: (To create partition, right-click the Unallocated space and select 'Create Partition'.)
For Windows 7/Vista and Server 2008
If you want to extend C drive by shrinking a partition, you'll find that it is impossible in Disk Management. After shrinking a partition, when you run 'Extend' command, it is greyed out, because the free Unallocated space is after D, only when you 'move' this space at the end of C, Extend command is available.
Then how to solve this probem? Refer how to extend partition in Windows 2008 Server.
Related Articles
- How to partition RAID 1?
- How to shrink partition in Windows 2008 Server?
- How to increase C drive space
- How to change partition size in Windows 2008 Server?
- How to resize VMware disk partition?
- How to merge Windows 2003 partitions?