When system C: drive is running out of space and 'Low Disk Space' warning pops up, it couldn't be better if you can resize C: drive, because it saves much time and make things easier. Previously, to solve this problem, you have to backup system and files, delete partitions, recreate larger C: drive and then restore, or fresh install Windows. How annoying and time-consuming it is.
Unlike Windows 2008 Server, there is no shrink and extend feature under Windows 2003 disk management, no shrink command integrated in the diskpart either, so to resize C: drive in Windows 2003 Server, you need third party partition software.
To resize Windows 2003 C drive, there must be other data partition on the same hard disk drive, as no server partitioning software is able to extend a partition by shrinking the partition on another hard drive.
Pay attention to data security when resizing C drive
It is indeed easy to resize system C: drive, but you'd better select a reliable partition tool. The disk partition parameters will be changed when you resize a partition (change partition size). An unreliable partition software is very likely to cause boot failure or data loss.
Step by step to resize Server 2003 C: drive
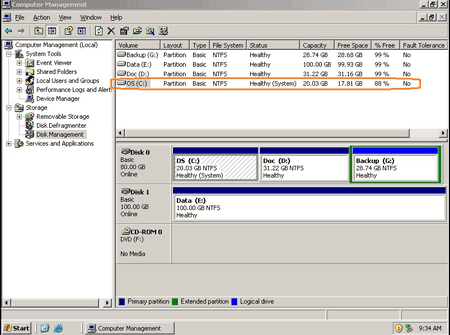
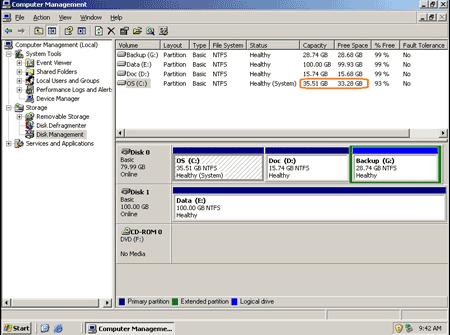
Open disk management and check disk partition layout. Here is drive C: D: G: on Disk 0, I want to shrink drive D and C:.
If you want to resize C: drive to smaller and create new partition, refer another article how to split Windows Server 2003 partition.
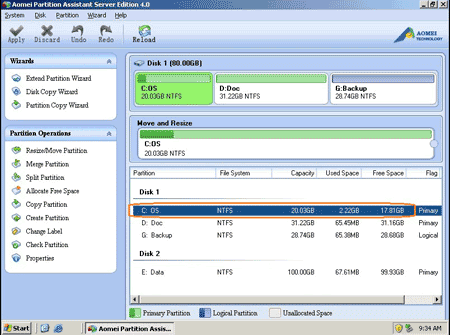
Step 1: Launch Partition Assistant Server, you'll see all disk partitions and the layout is similar with disk management.
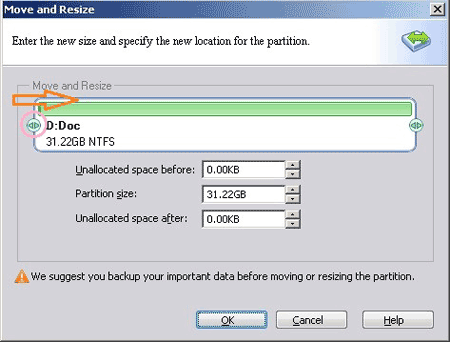
Right-click drive D: and select "Resize Partition", in the pop-up window, drag the left border rightwards to shrink it.
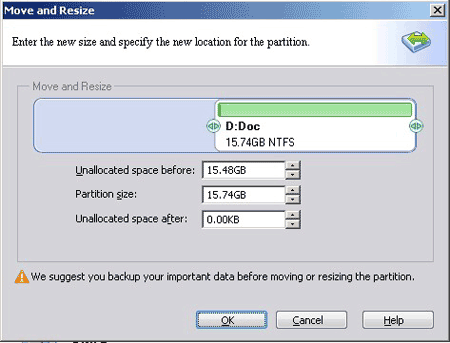
There will be some free Unallocated space created after C: drive.
If you drag right border leftwards, the unallocated space will be created behind drive D:.
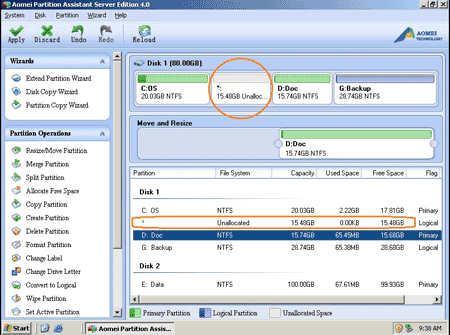
Step 2: Right-click C drive and select "Resize Partition", in the pop-up window, drag the right border rightwards to hold the Unallocated space.

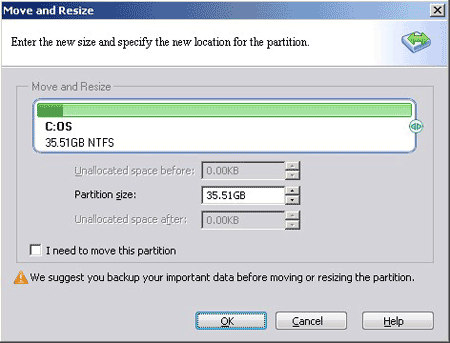
Click OK, in the main window, you'll find that system C drive has been resized.
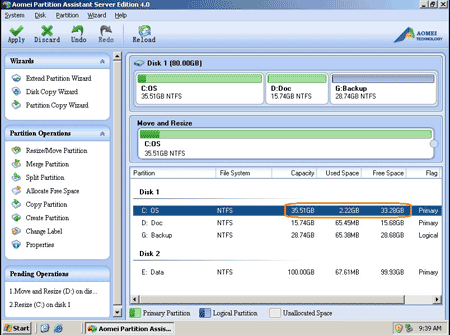
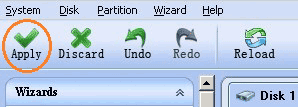
Step 3: Click 'Apply' on top left to proceed resizing operation.
Within several minutes both drive D and C: resized. Check in disk management.
In conclusion, you just need to drag and drop on the disk map to shrink an existing data partition to get some free Unallocated space, and then extend system C: drive without doing anything else.
If you want to resize C: drive by shrink an nonadjacent partition (drive G: above), there is an easier way without resizing partitions one be one, refer how to resize Server 2003 partitions.
Related Articles
- How to resize partition on Windows 2003 Server 64 bit?
- How to resize partition in Windows Server 2003 R2?
- How to resize RAID 5 partition?
- How to resize VMware virtual partitions?
- Partition manager for Windows 2003 Server